My mom used to make stuffed mushroom caps at the drop of a hat. “We’ve been invited to so-and-so’s for dinner. We’ll need to bring something.” Mushroom caps. “Company’s coming! We need an appy.” Mushroom caps. “Darren, what should we make for a treat?” Mushroom caps.
It’s easy to see why we loved them so much. They’re roasted (ergo, tender and sweet), with a nugget of flavourful, creamy cheese and seasonings, and plenty of salt—all hallmarks of comfort food. (See my mushroom soup below for the meal version of this appetizer.)
Even though mushrooms have been among my favourite foods since I was around five years old, I knew very little about them until I started learning about growing, foraging, smoking, pickling, and such, to gain more control over my food. Sort of a Homesteading: Level 2.
It’s vastly empowering to forage for mushrooms. I sought out the expertise of friends, family, and a book or two, until I felt confident in my ability to identify a few species without fail. I likely passed up some beautiful pine and chicken-of-the-woods mushrooms, but I was okay with that, because now that I knew how to identify chanterelles, I had a sure-fire endless supply of them.
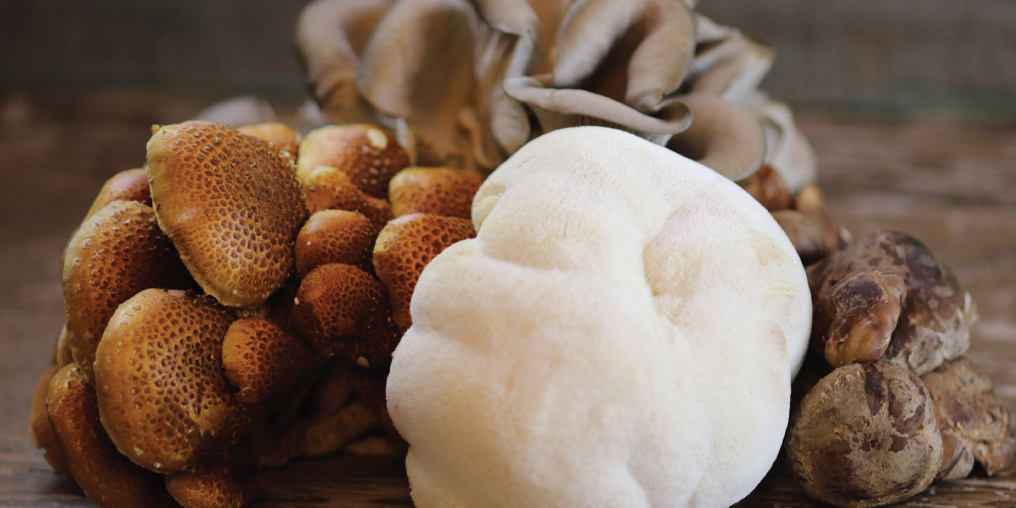
The next logical step is to grow mushrooms at home. I haven’t taken the plunge yet, but I was recently inspired when I had the honour of visiting Comox Valley Mushrooms. At this hermetic growing facility, the husband-and-wife team of Stoyan Petrov and Galina Petrova grow an astounding volume of mushrooms in a few very small spaces.
Their process is both simple and complex. Mushrooms grow in a web-like fungal network called mycelium or spawn, which grows in a natural material—the substrate. Different mushrooms thrive in different substrates (e.g. bran, soy husks, oats); because the ones grown by Stoyan and Galina would typically decompose dead hardwood trees in the forest, they use sawdust for a substrate.
After the substrate has been packed into bags, sterilized, and cooled, it goes to the air-controlled lab, where it’s inoculated with an isolated culture (mycelium) grown on the farm. Then the bags are stacked in the incubation room—where the CO2 is controlled and it’s always 22°C—before moving to the fruiting room, where the high humidity, light, and cooler temperature trigger mushrooms to pop up within about a week. After another week, the mushrooms are harvested and used substrate gets composted, becoming a very nutritious soil for future food production.
Throughout the tour, I couldn’t help but think how the whole process could be scaled down for home growing. It turns out I was onto something.
The easiest way to try mushroom growing at home is to buy an inexpensive ready-to-go kit, which are usually composed of mycelium of a specific type of mushroom and the exact right substrate in which to grow it. These are a fantastic way to get started: all you need to do is add water, tuck into a humid zone of your house, and you’re good to go.
You could go one step further, if you have an outdoor space, by buying mushroom spawn. With spawn, you’ll be able to nurture that mycelium growth to yield great quantities of mushrooms. Your substrate could be something like a log, a bed of straw, or wood chips, depending on what you’re growing. The investment is still incredibly small, but again, self-education is important if you’re going to do it right.
There are several reasons why mushroom growing has become a bit of a trend. It’s easy to do and takes very little time, it requires little investment or knowledge, and it produces a relatively unique item—especially if you’re growing a gourmet mushroom variety.
It’s also worth noting that a starter kit has a footprint of roughly one-quarter of a kitchen cabinet, so it’s a wonderful way to grow food even if you live in a no-yard, zero-growing-space environment. This simple, low-impact, low-effort project could be a great science experiment for your kids, too, with enjoyably edible results.
Mushroom growing and consumption have been rising in Canada for the past several years, partly because more people are decreasing meat consumption and shifting to a vegetarian or flexitarian diet. Mushrooms are a readily available, low-effort substitute for meat—sometimes directly swap-able in a recipe—and there’s nothing more satisfying than cooking with something you grew yourself, which may explain the new trend towards DIY mushrooms.
Oh, and they’re delicious? That has to factor in somewhere.
Welcome to the world of at-home mushroom farming—it’s on the rise. I’m no expert… but I’m learning and growing.
MIXED MUSHROOM SOUP FOR FOUR
WORKS WITH ALMOST ANY TYPE OF MUSHROOM!
Take 3 cups of mushrooms (rinsed & patted dry), toss with a minced clove of garlic, a splash of soy sauce (or substitute), and 2 tablespoons of olive oil.
Roast at 400 degrees on a sheet pan for 15 to 30 minutes, depending on the size of mushroom you’re using. Turn mushrooms often. After the first 15 minutes, remove and pull aside any that are well roasted (browned, but not burned), and continue until all are roasted.
Meanwhile, in a heavy-bottomed pan over medium heat, lightly brown half a finely chopped onion in 2 tablespoons of butter. Add a clove of minced garlic, a bay leaf, and a heaping tablespoon of your chopped fresh herb of choice (I recommend thyme, tarragon, or a parsley/rosemary mix).
Chop your roasted mushrooms and add them to the pan. Once all the ingredients are browned, add 2 tablespoons of flour and mix well, ensuring no dry flour remains.
Add a half cup of white wine (optional) and stir until consistent. Follow up by adding a litre of stock (your choice: veg, mushroom, or chicken all work), bring to a boil and stir until the mixture is consistent in texture, colour, and thickness. Turn heat to medium-low and simmer for 15 minutes. Generously season with salt and pepper, then stir in 250 ml of whipping cream. Simmer for another 15 minutes, garnish with a little Parmesan cheese (if you’ve got it) and any leftover chopped herbs you have.
Serve and enjoy!

